import pandas as pd
import psycopg2
from sqlalchemy import create_engine, text
# create a dataframe
df = pd.DataFrame({'col_a': [1,2,3], 'col_b': [4,5,6]})
df| col_a | col_b | |
|---|---|---|
| 0 | 1 | 4 |
| 1 | 2 | 5 |
| 2 | 3 | 6 |
In this post, I’ll be demonstrating how to install PostgreSQL on a development workstation running Ubuntu Desktop.
PostgreSQL is a powerful, open source object-relational database system with over 35 years of active development that has earned it a strong reputation for reliability, feature robustness, and performance. [1]
I’ll be going through these steps. I’ll include a brief introduction to the tools mentioned.
I’m using this workstation today.
I’ll be covering the minimum steps to get PostgreSQL running without optimisation or configuring security. You will need to consider these depending on your situation - refer to the PostgreSQL docs for more information. Leave a comment below if you have any config tips!
I’ll upgrade Ubuntu before installing PostgreSQL:
$ sudo apt update
$ sudo apt upgrade
Installing PostgreSQL via apt on Ubuntu will install the PostgreSQL version that’s currently supported by Ubuntu. This may not be the latest available PostgreSQL version. At the moment, Ubuntu includes PostgreSQL v16.9, but v17 is available. The version shipped with Ubuntu is tested and stable, but the latest version may include more features, security patches and bug fixes. I’ll use v16.9 for now because it’s easier to install. For the latest available version, see: PostgreSQL Apt Repository.
Installation is simple:
$ sudo apt install postgresqlThere are a few options for managing PostgreSQL:
The PostgreSQL installer creates a new Linux user called postgres for database administration.
I’ll use sudo to start psql as user postgres:
$ sudo -u postgres psqlI’ll then create a password for database user postgres in psql:
postgres=# \password postgres
Enter new password: password
Enter it again: password
postgres=# \qI’m going to use the postgres user account with password=password in the examples below for connecting to the database and creating backups, as I’ll be deleting the database later. It’s highly recommended to create additional users with proper passwords for day-to-day interaction with your PostgreSQL databases, with restricted privileges. Leave a comment if you’d like me to write a follow-up post on this.
I’ll try to connect to the database server using DBeaver Community. It may prompt you to install PostgreSQL drivers the first time you do this.

Before I can create a database, I need to configure the server for my location (New Zealand).
Locale support refers to an application respecting cultural preferences regarding alphabets, sorting, number formatting, etc. PostgreSQL uses the standard ISO C and POSIX locale facilities provided by the server operating system. [2]
I’ll start by finding the installed version number:
$ ls /etc/postgresql
16
I’ll then open the PostgreSQL config file in a text editor:
$ sudo nano /etc/postgresql/16/main/postgresql.confI’ll check that timezone and log_timezone is ‘Pacific/Auckland’ (this should be set to system timezone by default).
I’ll then install the locale I want to use for my databases (en_NZ.utf8):
$ sudo locale-gen en_NZ.utf8
Generating locales (this might take a while)...
  en_NZ.UTF-8... done
Generation complete.

$ sudo update-locale

$ locale -a
en_NZ.utf8
Finally I’ll restart PostgreSQL so that changes take effect:
$ sudo service postgresql restartI’ll login to psql and create a new database called sandbox:
$ sudo -u postgres psql

postgres=# create database "sandbox" with owner "postgres" template='template0' encoding 'utf8' lc_collate='en_NZ.utf8' lc_ctype='en_NZ.utf8';
CREATE DATABASE
I’ll use the \l command to list all databases and check that the new sandbox database has been created correctly:
postgres=# \l
List of databases
Name | Owner | Encoding | Locale Provider | Collate | Ctype | ICU Locale | ICU Rules | Access privileges
-----------+----------+----------+-----------------+-------------+-------------+------------+-----------+-----------------------
postgres | postgres | UTF8 | libc | en_US.UTF-8 | en_US.UTF-8 | | |
sandbox | postgres | UTF8 | libc | en_NZ.utf8 | en_NZ.utf8 | | |
template0 | postgres | UTF8 | libc | en_US.UTF-8 | en_US.UTF-8 | | | =c/postgres +
| | | | | | | | postgres=CTc/postgres
template1 | postgres | UTF8 | libc | en_US.UTF-8 | en_US.UTF-8 | | | =c/postgres +
| | | | | | | | postgres=CTc/postgres
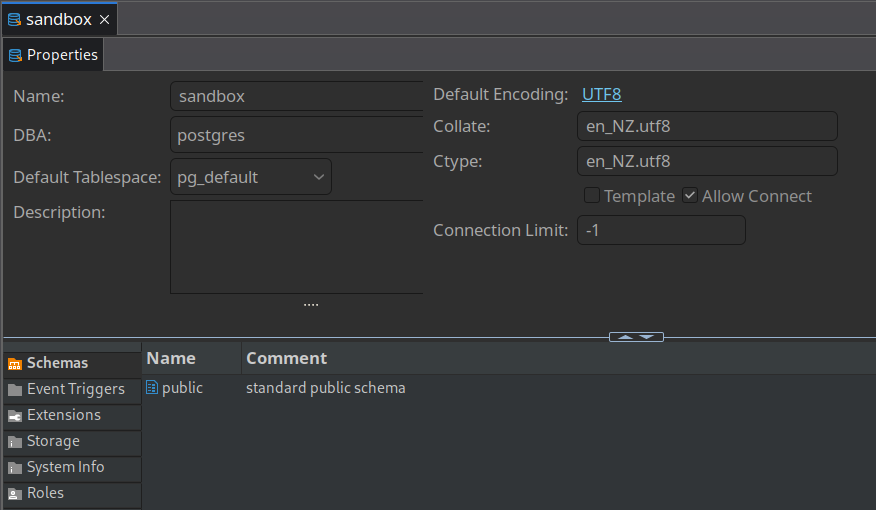
(4 rows)I’ll then use the connection I created in DBeaver earlier to view the new database:
I’m going to use pandas to create a table, but before I do that I’ll need to install a few dependencies. pandas uses SQLAlchemy for interacting with SQL databases, which in turn uses psycopg2 for interacting with PostgreSQL.
SQLAlchemy provides abstraction for interacting with multiple database systems through the same model. It’s ideal for creating applications which need to support more than one database engine: SQLAlchemy is the Python SQL toolkit and Object Relational Mapper that gives application developers the full power and flexibility of SQL. It provides a full suite of well known enterprise-level persistence patterns, designed for efficient and high-performing database access, adapted into a simple and Pythonic domain language. [3]
Psycopg is the most popular PostgreSQL database adapter for the Python programming language. Its main features are the complete implementation of the Python DB API 2.0 specification and the thread safety (several threads can share the same connection). [4]
Version 3 of psycopg is available - I’ll test and compare that in future and may consider switching.
I’ll install SQLAlchemy:
$ pip install sqlalchemyI’ll install psycopg2 next. I’m installing from source which requires some dependencies (you may have these already). See the psycopg docs for more installation options, including a binary package which avoids the dependencies.
$ sudo apt install python3.13-dev

$ sudo apt install libpq-dev

$ pip install psycopg2Next, I’ll create a simple pandas dataframe and write it to a new table.
import pandas as pd
import psycopg2
from sqlalchemy import create_engine, text

# create a dataframe
df = pd.DataFrame({'col_a': [1,2,3], 'col_b': [4,5,6]})
df| col_a | col_b | |
|---|---|---|
| 0 | 1 | 4 |
| 1 | 2 | 5 |
| 2 | 3 | 6 |
# create a SQLAlchemy engine
engine = create_engine(
    "postgresql+psycopg2://postgres:password@localhost:5432/sandbox")

# create a SQLAlchemy connection from the engine
with engine.connect() as conn:
    # pass the connection to pandas for creating the new table
    # the if_exists arg tells pandas to replace the table if it already exists
df.to_sql('new_table', conn, if_exists='replace')I’ll test that the data was written to the table by reading it back. I’ll use a few different methods:
SELECT statement via SQLAlchemy.read_sql / SELECT statement via pandas.SELECT statement via psycopg2.# get a new connection and run an SQL SELECT statement on the new table
with engine.connect() as conn:
for row in conn.execute(text('SELECT * FROM new_table')):
print(row)(0, 1, 4)
(1, 2, 5)
(2, 3, 6)with engine.connect() as conn:
# run the same SELECT statement via pandas
df_new = pd.read_sql('SELECT * FROM new_table', conn, index_col='index')
df_new.head()| col_a | col_b | |
|---|---|---|
| index | ||
| 0 | 1 | 4 |
| 1 | 2 | 5 |
| 2 | 3 | 6 |
# get a database connection
conn = psycopg2.connect(database='sandbox', user='postgres', password='password', host='localhost')
# get a cursor
cur = conn.cursor()
# execute the select statement
cur.execute('SELECT * FROM new_table')
# fetch and print all results
print(cur.fetchall())
# close the cursor and connection
cur.close()
conn.close()
[(0, 1, 4), (1, 2, 5), (2, 3, 6)]pg_dump is a command-line tool included with PostgreSQL for backing up a database. It creates an SQL script for rebuilding the schema and inserting the data.
I’ll run pg_dump as user postgres, dumping the sandbox database to file /tmp/sandbox_backup.sql:
$ sudo -i -u postgres pg_dump sandbox > /tmp/sandbox_backup.sqlI’ll then use $ cat /tmp/sandbox_backup.sql to view the contents of the file:
--
-- PostgreSQL database dump
--

-- Dumped from database version 16.9 (Ubuntu 16.9-0ubuntu0.24.04.1)
-- Dumped by pg_dump version 16.9 (Ubuntu 16.9-0ubuntu0.24.04.1)

SET statement_timeout = 0;
SET lock_timeout = 0;
SET idle_in_transaction_session_timeout = 0;
SET client_encoding = 'UTF8';
SET standard_conforming_strings = on;
SELECT pg_catalog.set_config('search_path', '', false);
SET check_function_bodies = false;
SET xmloption = content;
SET client_min_messages = warning;
SET row_security = off;

SET default_tablespace = '';

SET default_table_access_method = heap;

--
-- Name: new_table; Type: TABLE; Schema: public; Owner: postgres
--

CREATE TABLE public.new_table (
    index bigint,
    col_a bigint,
    col_b bigint
);


ALTER TABLE public.new_table OWNER TO postgres;

--
-- Data for Name: new_table; Type: TABLE DATA; Schema: public; Owner: postgres
--

COPY public.new_table (index, col_a, col_b) FROM stdin;
0       1       4
1       2       5
2       3       6
\.


--
-- Name: ix_new_table_index; Type: INDEX; Schema: public; Owner: postgres
--

CREATE INDEX ix_new_table_index ON public.new_table USING btree (index);


--
-- PostgreSQL database dump complete
--To test that the backup worked correctly, I’ll delete the existing sandbox database and attempt a restore.
$ sudo -u postgres psql

postgres=# DROP DATABASE sandbox;
DROP DATABASE
postgres=# \l

   Name    |  Owner   | Encoding | Locale Provider |   Collate   |    Ctype    | ICU Locale | ICU Rules |   Access privileges
-----------+----------+----------+-----------------+-------------+-------------+------------+-----------+-----------------------
 postgres  | postgres | UTF8     | libc            | en_US.UTF-8 | en_US.UTF-8 |            |           |
 template0 | postgres | UTF8     | libc            | en_US.UTF-8 | en_US.UTF-8 |            |           | =c/postgres          +
           |          |          |                 |             |             |            |           | postgres=CTc/postgres
 template1 | postgres | UTF8     | libc            | en_US.UTF-8 | en_US.UTF-8 |            |           | =c/postgres          +
           |          |          |                 |             |             |            |           | postgres=CTc/postgres
(3 rows)
After running the DROP DATABASE sandbox; statement, the sandbox database has gone.
I’ll recreate the database:
postgres=# create database "sandbox" with owner "postgres" template='template0' encoding 'utf8' lc_collate='en_NZ.utf8' lc_ctype='en_NZ.utf8';
CREATE DATABASE
Then I’ll use the \c sandbox command to switch to the sandbox database, and \dt to display tables within that database.
postgres=# \c sandbox
You are now connected to database "sandbox" as user "postgres".
sandbox=# \dt
Did not find any relations.
There aren’t any tables, confirming that deleting and recreating the database was successful.
Finally I’ll restore the database from the script I created earlier:
$ sudo -u postgres psql -d sandbox < /tmp/sandbox_backup.sql
SET
SET
SET
SET
SET
 set_config
------------

(1 row)

SET
SET
SET
SET
SET
SET
CREATE TABLE
ALTER TABLE
COPY 3
CREATE INDEX
I’ll do one last test, to make sure that the data in the restored table matches the original:
with engine.connect() as con:
    for row in con.execute(text('SELECT * FROM new_table')):
        print(row)
(0, 1, 4)
(1, 2, 5)
(2, 3, 6)In this post, I’ve demonstrated how to install and use PostgreSQL.
In future posts, I plan to explore PostgreSQL more and install some other database systems. I’d like to benchmark different methods of connecting to PostgreSQL and try out psycopg v3.